I promised my daughter that we would make gingerbread houses this Christmas season. One month later, I kept that promise!
What was really cool was that we made this gingerbread house from scratch. Before, we bought pre-made cookies or kits, which made it a lot easier especially for the gingerbread building party we hosted last year.

In the past, we also used just graham crackers to make houses.

There was one catch to buying kits, though. A lot of the times, pre-made cookies or kits have a lot of additives to help preserve the cookies for long periods of time. I understand using preservatives when the kit is expected to sit on a store shelf for a month at a time or longer. However, I’m not comfortable eating it.
This year, I wanted to be able to eat the gingerbread house. I wanted our family to jump on that house like a hoard of giants on the attack!
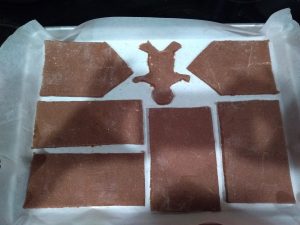
To make the gingerbread house, I used the same recipe from my gingerbread cookies post, HERE. I mainly guessed as far as what the dimensions of the house needed to be, though I did use a ruler to make sure all matching sides actually did match. I made the length of the longer walls 6 inches with a height of 4 inches. The shorter walls were 4 inches long by 4 inches tall, with the triangular point section. Again, I was guessing with the top point being centered. Next year I’ll do actual dimensions.
The 2 roof sections I made a bit longer than the house, so their final dimensions were 7 inches long by 4 inches.
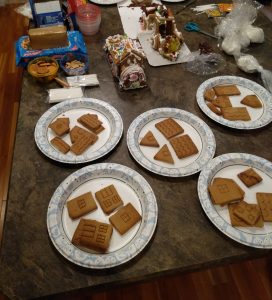
Once it was all said and done, the pieces looked like this:
My daughter cut out gingerbread men and flowers with the extra dough. To err on the safe side, I baked these for 12 minutes.
In the past I used all kinds of icing for making gingerbread houses: Homemade buttercream, store bought icing, store bought buttercream, cream cheese icing.
It turns out, the best icing for connecting the walls and roof together is royal icing.
This year was the first year I tried using royal icing after doing some research and finding out that everyone else in the world already knew this. It does do a great job. It hardens within a couple minutes, sealing the wall edges together. Look at the house we made and I did a sloppy job cutting out the walls and roof pieces, yet that royal icing held it together perfectly.
Royal icing is very simple.
Royal Icing
Ingredients:
- 4 egg whites
- 1 tsp cream of tartar
- 4 cups powdered sugar.
Directions:
With an electric mixer, beat the egg whites and cream of tartar to firm peaks.
On a lower speed, slowly add the powdered sugar a little at a time.
Once the powdered sugar is fully incorporated, turn the mixer on high again and beat for an additional few minutes until the icing is nice and fluffy.
I will add, we spooned half of the royal icing into a bag with a corner cut off to pipe it onto the wall and roof edges. The remaining royal icing needs to be covered with plastic wrap while it waits to be used or else it will dry out.
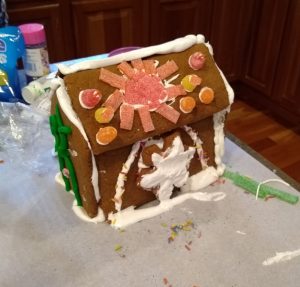
And that’s it. Glue the walls and roof pieces together with the royal icing, then let the decorating fun begin!
So. Much. FUN!